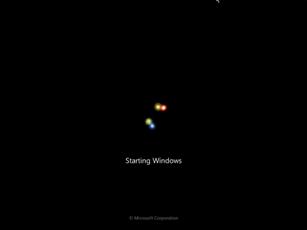
How to check quality of MP3 file

I have been searching for a long time for tools checking the real quality of MP3 files. Many tools will just base their assumptions on the bitrate and encoder type alone (i.e. EncSpot). I think that’s rather insufficient. Though all knowledge on compression artifacts exists and computer programmer’s are out there making incredible stuff, all of the amazing audio analyzing on mpeg has to be done by ears…

Let’s see how we can at least do “something” to get a definite answer to the question: “Is this a bad file” without having to put our ears to the test. Mind though that it is in many ways like a cheap medical test where (in this case) a NO is 100% accurate, but a YES is just a way of saying: I’m not sure… let’s do more testing.

But first, an introduction.

With MP3 a revolution was born: Music became “portable”. But there’s a catch. MP3 is a lossy compression and will sacrifice quality for size. To do this without being noticed too much, MP3 uses a technique based on Psychoacoustics, where it filters out quite frequencies that are adjacent to loud frequencies. Scientists noticed that our ears mask those frequencies (we can’t hear them), so getting rid of these frequencies should go unnoticed. This way the encoder doesn’t have to “encode” those inaudible frequencies and thus can preserve a lot of space (10:1 is no exception). To preserve even more space (20:1) and so use lower bitrate, the encoder will filter out more frequencies. At some point that process becomes noticeable. That’s why very low bitrate MP3 sounds so horrible. ( This description is far from complete. ) If you want to know more about psychoacoustics, read this Wikipedia article..

MP3′s come in different qualities, i.e. how much compression is applied. Usually the compression correlates to the amount of kb/s (kilobits per second) is used to store and to reproduce the music. The more kb/s are available to store sounds, the better the quality can be, because the encoder can leave more of the quieter frequencies intact. And while this is “technically” sound, I’m going to prove to you that kb/s alone is far from a trustworthy indication of quality.

Digital MP3 music comes in different “qualities”, depending on how “lossy” the compression is. Let me list a few of them in order of “sounds horrible (like a cellphone)” to “sounds like the real thing”:

  1. 48 kb/s – This amount of compression sounds like your average AM portable radio and are mainly used to deliver speech.
  2. 96 kb/s – This sounds like a very poor quality Youtube video. This compression is often used to broadcast speech and music to mobile devices on GPRS (edge) or 3G, like your iPhone.
  3. 128 kb/s – This sounds acceptable to most people, but most (if not every) audiophile will notice the loss in quality without comparing it to the source. It’s is the most used compression for (private) MP3 music files on the internet and is mainly spread by filesharing, because it’s the best trade-of between size and quality.
  4. 192 kb/s – This sounds like CD quality to most people. Audiophiles will notice a slight degradation in quality, but only when comparing it to the source (so called A/B tests). It’s less portable, because it’s bigger and is better known as a better quality illegal download.
  5. 320 kb/s – This is the closest you can get to CD quality and still be compatible with most portable players. Audiophiles claim they can hear the difference, but it’s like tasting wine… (you know what I mean). This compression is used on many (legal) music download sites.
  6. 640 kb/s – Like twice as good as the best… (can that be?). Sadly some players won’t keep up with the amount of bits per second, or because the hard- and/or software won’t allow it.

Now, besides MP3 (which is MPEG 1 layer 3) there are many other lossy compression techniques out there, like mp2 (MPEG 2 layer 1 used by digital satellite), ogg, mwa and aac. AAC is known as the successor to MP3 and can achieve much better quality than at the same bitrate, through better use of the psychoacoustic schemes. An AAC file of 96 kb/s sounds like a 192kb/s MP3 file (debatable). AAC at 256 kb/s is widely used by iTunes and sounds awesome (very little trade-off between quality and compression, you get both).

Just for the record, there are some loss-less compression technique out there, like FLAC. These techniques will reduce the size of CD quality music without discarding any frequencies. The reproduction of this compressed file will be bit-by-bit identical to the source. Flac is mainly used for archiving CD collections and can achieve a considerable reduction in filesize.

After this lengthy, but still absolutely incomplete introduction, NOW ON TO THE MAIN DISCUSSION.

How to check the REAL quality

As we discussed above: 320 kb/s sounds better than 128 kb/s. Given this knowledge, some people make a habit of re-encoding bad 128 kb/s source material into 320 kb/s files (or even FLAC!!). In doing so, they incorrectly assume the quality will improve. It doesn’t, because once a music-file is compressed to 128 kb/s, the information removed to reduce size is lost forever. Nothing will ever recover what was lost. It’s like an image resized from 1000×1000 pixels to 100×100 pixels and then back to 1000×1000. The result will be a 90% loss of all information and the image will be blurry. There is no way anyone can sharpen it up again so that it contains the same details as the original 1000×1000 image.

Sadly, for whatever reason, there are 320 kb/s files out there that are in fact 128 kb/s MP3′s that have been upscaled somehow. But because 128 kb/s sounds pretty good as it is, it can be tricky to hear whether or not the file has been tampered with. There is (afaik) NO software out there that will do anything more then read the headers en look at the bits per second to tell you what’s good or not. According to audiophiles “listening” is the only way to tell if a file is good or bad, and that’s it. I will show you however, that a “bad” or “fraud” mp3 can be uncovered just by looking at it’s spectrum and without waking the neighbors.

The analysis is based on the frequency spectrum of the sound in the MP3 file. You can visualize this in many audio editors like Audition. We will be looking for giveaway features of most (if not all) MP3 encoders, i.e: the cut off frequency at 15 (or) 16 khz and clipping. Let’s look at some pictures:

mp31

The above image shows the spectral analysis of a CD quality file. The way it works is quite simple: The X axis is time, the Y axis is frequency and the illumination is the volume. Bright yellow means strong frequencies, red is weaker and black is none. This graph shows that all frequencies between 0 Hz en 20.000 Hz are very well present. Now, let’s look at a 128 kb/s compression of the same file:

mp32

Notice the difference in this 128 kb/s compressed file. All frequencies above 15,8 khz are gone (black). That’s because most MP3 encoders apply a “filter” on the sound before compressing it. Yes… This has absolutely nothing to do with psychoacoustics, but is just a rude filter that almost all encoders use. The cut-off frequency is thereby a strong indicator of the original bitrate. Most encoders cut off at 16 kHz for 128 kb/s to 8 kHz for 64 kb/s. Once these filters have been applied, the filtered-out frequencies are lost and cannot ever be recovered.

Clipping
Note the small spikes that go up all the way to 22 khz. These are points where the music “clippes”. Clipping happens when the waveform is bigger that the container and is flattened at the top, it will produce strong harmonic distortion or overmodulation. Read more about clipping.

mp33

Above image: Example of clipping.

Once we saved the file again in MP3 320 kb/s the data previously lost in converting it to 128 kb/s is still missing. Consequently “upgrading” our file to 320 kb/s did not improve quality at all it only made the file almost 3 times as big. ( from 3,97 Mbyte to 9,93 Mbyte ).

mp34
 

Many so called CD quality 320 kb/s downloads are ripoffs. Let’s take a look at one of these wonderful 320 kb/s downloads that are in fact upgraded (in television midst they speak of upscaling) low quality MP3′s.

mp35

Now, this is quite an interesting one. Notice how the cutoff frequency seems to be there, but not quite “cutting off”… This file looks like it was encoded to 128 kb/s but with the cutoff filter disabled. As you can see the encoder tries to encode the high frequencies when they are really strong (hi hats + percussion), but eventually the encoder is loosing a lot of the information. Typically this will look like a largely blank upper frequencies area with brief spikes of high frequencies, strongly reduced in resolution.

I took the original to compare: The original (full bandwidth) file is very different from the (fake) 320 kb/s file. So what’s going on here?

mp37


Actually during my investigation I stumbled upon some annoying properties of Fraunhofer’s MP3 encoder. It seems that even with cutoff filter disabled (or set to 22kHz), the 320kb/s file (from the same original source as the image above) is somewhat filtered. There is a noticable “cutoff” line that isn’t present in the original file. Though the filtered 128 kb/s file will look flattened, this one still has some high frequencies in it. This file is bad, that’s for sure, but it’s not because of upscaling… !!!

mp38

This example above shows the same file, once in 320 kb/s unfiltered (left) and 128 kb/s unfiltered (right). Notice that their is some difference. The 320 file is probably better, but still not what we came to suspect from 320 kb/s files.

mp39
 
 
This is a comparison between the original and LAME (3.8). There is some degree of graining, but the overall frequency response seems better (wider) than FhG.

Conclusion
You can always spot a bad quality 320 kb/s MP3 by looking at the spectrum analyzer, but you can only be sure of the cause of the degradation when you see a very obvious 16khz (or less) cutoff. When the cutoff is overshooting, matters get more complicated. It can be a 128 kb/s source that was rendered without the filter, like we tried or it could be an original 320 kb/s file that was rendered with a bad encoder. In this case (to my surprise) the Fraunhofer encoder did not perform as expected, while the LAME encoder was quite good, although there is a little change in graininess between the original and the LAME 320kb/s encoded file.

Anyway. I hope I have been of any assistance doing these little tests today. :-)

Add a dial string to windows mobile 6.5 DUN

When connecting windows mobile 6.5 to the internet via bluetooth dail-up and gprs (edge or 3G), you’ll notice that their aren’t any andvanced modem settings available anymore.

Establishing a connection just by dialing *99# is impossible, you’ll get ” The answering modem has disconnected “. You’ll need to add a dial string to include at least the APN information.

To enter a dial string now requires the use of a registry editor. You can find a good one here

To enter the dial string, you’ll have to edit registry-entry “1″ in HKLM/Drivers/Unimodem/Init
change it to : AT+CGDCONT=1,”IP”,”web.be”
“web.be” is the APN name (ISP).

You can then safely connect using just dialing *99#

Connect Ipaq to Mobile Vikings via LG KP500 and Dialup in Windows Mobile

I own a simple cellphone GSM, LG Cookie KP500 and an old IPAQ 2790b mobile device. The cellphone connects via EDGE to the mobile network (Mobile Vikings). I want to use the phone’s internet-connection on the IPAQ. This device is using windows SE 2003, windows mobile 5 or WM 6.5 … ( This tutorial will cover windows mobile 5 )

Here is what I did to get it working:

First make sure the internet is configured and working on the cellphone. If you can connect and surf the web on your phone, continue reading. Otherwise go get it working first.

You will need the USERNAME, PASSWORD and APN from your provider. Most providers use general username/passwords that can be found on their support homepage. Mobile Vikings settings can be found here.

First you’ll have to create a Dailup network trough Bluetooth on the windows mobile device.

Go via START to settings, Choose Connections:
SS-2011-01-10_19.15.32

Click (or tap) on the icon “Connections”.
Click (or tap…) on the “Add a new modem connection”.
SS-2011-01-10_19.18.03

Enter a name for your connection and choose Bluetooth from the dropdown menu.
Click NEXT
SS-2011-01-10_19.22.06

Enter *99# as phone number. This will not actually dial that number. It will in stead tell your cellphone to connect using the standard profile. You can use *99***1# too, where 1 is the number of the internet profile. *99***3# will use profile three. When you tested internet successfully on your phone prior to installing the connection on your ipaq, then the standard profile will work: so use *99#
SS-2011-01-10_19.26.43

Enter the username and password. Remember you got them from your provider. Mobile Vikings users can enter web as the username and web as password. Leave the domain field empty.
Now click on ADVANCED.
SS-2011-01-10_19.29.01

On the General tab you may choose the highest baut rate (115200). It actually doesn’t matter what speed you choose, cause this is a virtual COM port. When using BT 1,2+ you’ll get max 1Mb/s, when using BT2.0 or higher the Edge or G3 limitation will be the maximum speed you’ll get. De-select “Wait for dial tone” and enter this line after “Extra dial-string”: +CGDCONT=1,”ip”,”web.be” Mind that web.be is my APN, replace this with your APN if it is different.
Click on Port Settings
SS-2011-01-10_19.31.50

Set Port Setting as displayed above. It may already be configured that way.
No go to TCP/IP
SS-2011-01-10_19.33.21

De-select “Use software compression” and “Use header compression”. If found this to be increasing the internet speed by factor 2. 96kbs vs. 128kps. I’m not sure why this is. You may want to experiment with these settings.
Now click OK
Click FINISH
click ok again and click on the cross to close the Settings window

Now, to make this work, your Phone and IPAQ need to be paired. Use the standard procedure. ( This procedure may be different for your IPAQ version ).
Go to Bluetooth Manager and choose paired devices from the menu on the bottom right. ADD a device (click on the search icon). Select the phone from the list and enter the passkey (on both devices). The devices are now paired.

When you start an internet application ( Opera or another browser ), the IPAQ will automatically connect trough bluetooth. Watch your phone: It might ask you to authorize the connection.

Happy surfing.

BBox2 Sagem Blocked – NAT out failed First packet in connection is not a SYN packet

Sometimes a Belgacom Modem Sagem 3464 ( BBox 2 ) may block all outgoing traffic on any port except for port 80. You’ll get all sorts of errors from VPN clients, Bittorrent clients, and non port 80 wibsites. Typicaly the errors complain about being unable to connect. Also, the router will block all NAT and Server incomming traffic as well.

In the security log ( firewal -> security log ) you’ll find entries like these:

1
2
3
4
5
6
<font size=-2>Outbound Traffic  Blocked - NAT out failed    TCP 192.168.1.200:1230->81.240.173.98:2499 on ppp0
Outbound Traffic    Blocked - NAT out failed    TCP 192.168.1.200:1229->84.105.73.50:12000 on ppp0
Outbound Traffic    Blocked - NAT out failed    TCP 192.168.1.200:1228->95.7.96.189:17500 on ppp0
Outbound Traffic    Blocked - NAT out failed    TCP 192.168.1.200:1227->82.170.211.77:12000 on ppp0
Outbound Traffic    Blocked - NAT out failed    TCP 192.168.1.200:1226->88.66.131.23:3170 on ppp0
Outbound Traffic    Blocked - NAT out failed    First packet in connection is not a SYN packet: TCP 192.168.1.50:60734->204.236.227.24:80 on ppp0</font>

According to many internet forum posts this can only be solved by rebooting the modem, but there is another, quicker and better solution, especially when you don’t want to reboot the modem.

To quickly resolve this issue without rebooting ( thus without disrupting services like streams, uploads, etc. too long — rebooting takes minutes, while this solution takes less then a second) telnet to the Sagem modem, enter username: admin and password: BGCVDSL2
at the command prompt type:

fw_restart

Add_New_Post_‹_WWWalter_—_WordPress_-_ChromePlus-2010-10-24_14.33.45

Close the telnet session. You’ll now be able to connect to other ports and NAT functionality will be restored.

There is no permanent fix.